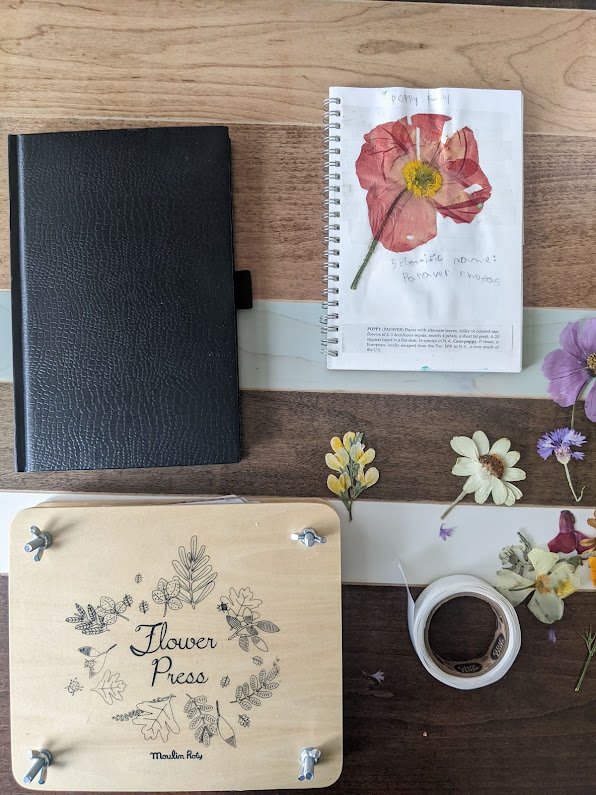
Creating a Pressed Flower Journal
"The flowers, it is true, are not new; but the children are; and it is the fault of elders if every new flower they come upon is not to them a Piccola, a mystery of beauty to be watched from day to day with unspeakable awe and delight."
-Charlotte Mason: Home Education p 53
In her “A Formidable List of Attainments for a Child of Six”, Charlotte Mason says that by age 6 a child should be able to mount in a scrap book a dozen common wildflowers, with leaves (one every week); to name these, describe them in their own words, and where they found them.
When I shared this on Instagram, I was met with equal parts excitement over my daughter’s journal and curiosity over how one can begin this themselves.
Supplies Needed:
1 Journal with acid free, mixed media paper
1 flower press (or heavy books)
1 pen
Glue dots
Pressed Flowers
Steps:
Step 1: Collect your flowers. We collect many of our flowers from our yard, accessible neighborhood trails, and open spaces that are not under state or federal protection. We are careful not to pick too many flowers, endangered flowers, or protected species.
Step 2: Press the flowers: Pressing flowers can take 2-3 weeks depending on the species and thickness of the petals. Cosmos, flax, poppies, and babies breath can all press in 7-10 days. Zinnia, marigolds, roses, and daisies sometimes need 3 weeks. They key to long lasting dry flowers is making sure all the moisture is removed. If there is water left within the flower it may mold later on. I like to use my press starting with the back section so I’m able to add more flowers all summer.
Step 3: Mount the flowers in your book: First decide where you want your flowers to go in your book and how much you’d like to write. My daughter has a smaller notebook so she mounts one flower per page. My notebook is able to have 2 flowers per page. Gently place your flower on the page and use glue dots to secure the petals and stamen. Glue dots are easier to use that traditional glue because it won’t spread. You may need tweezers for more delicate flowers. You can also use scrapbook tape to protect the stems and tape them to the page.
Step 4: Add your written details. For flowers collected out and about my daughter will write where we found them and the month of the year it was collected. She also writes the name of the flower and the family it comes from. For garden flowers we write the year it was planted. I like adding relevant information in my journal as well including medicinal properties of the flower and where it originates from in history.
When I first read through Charlotte Mason’s Formidable List of Attainments for a Child of 6 (and her subsequent list for a child of 12) my daughter was newly 6. I felt like the list gave me focus and direction during that year. Honestly, it felt good to have something to check off and say , “We did it.” I was also met with the realization that I was missing things in this education too, for I had not mounted 12 flowers, describe them, and name where I had procured them.
Creating and keeping a wildflower journal is a way for me to continue my own education and share the value of this education with my child. It’s also a beautiful way for me to hold the memories of our walks, hikes, and gardening in a tangible way.
I hope this helps inspire you to create your own wildflower journal!


