
Waldorf Paper Stars Tutorial
My daughter loves stars, so much so that she decided to decorate her brothers room in an outer space theme while we were waiting for him to come home.
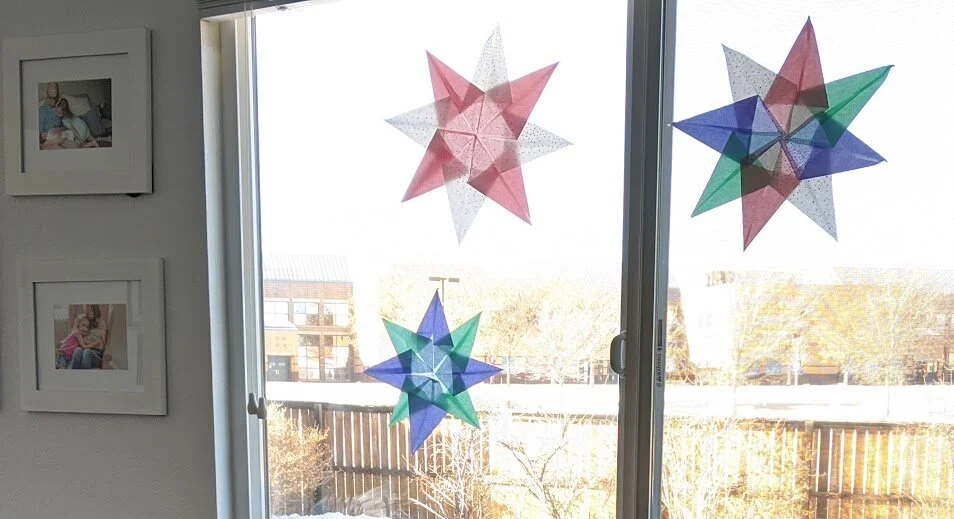
With Christmas behind us, it’s easy to feel the bleakness of winter, this is usually when we start to cozy up and create warm spaces for our family to enjoy the cold days together. I’ll be sharing more on how we do that in the next post but for today, I’d like to share how we create Waldorf stars to decorate our home with and bring a little more warmth in.

We use tissue paper but you can also use kite paper or construction paper.
My preferred size to work with are 5x5 squares but we also make smaller 4x4 and even some 3x3 squares for our stars.
Supplies:
Construction paper, tissue paper, or kite paper cut into squares
Scissors
Glue
This tutorial is for 8 point stars
Step 1: Fold each square in half on the diagonal

Step 2: With the square turned to look like a diamond, fold the top the two corners in to create a point. Do this fold with each piece of tissue paper


Step 3: Place a line of glue one side of the thick end of the folded diamond, place a second folded piece on top


Step 4: When you come to your last piece of the star, glue one end on top and tuck the second end under the beginning of the star

We enjoy hanging our stars in our homeschool room windows to let the light shine through.
I hope you enjoy this tutorial, I can wait to see the stars you create!